How To Get A Brown Tan Instead Of Orange
Don’t expect to get self-tanning right on your first go.
Those who have been self-tanning for years know that practice makes perfect, and you will likely experience a couple of hiccups until you perfect your technique and find the right product.
The biggest issue most people face when self-tanning at home is that their skin turns an orange color, rather than a delicious bronze.
This is really not ideal and is a huge giveaway that you have used a self-tanner when you really just want your skin to appear naturally sun-kissed.
How exactly do you achieve a brown tan instead of an orange one?
There are a few steps to take to ensure that your tan does not turn out orange. First, you need to apply the right preparation; secondly, you need to choose the right formula, and then you need to select the right shade. These steps are crucial to ensure you achieve the desired tan, with no tell-tale orange shades.
Self-tanning is a skill you need to learn, but the steps and tips below are a good way to get started on the right foot, helping you achieve a brown tan instead of an orange one.

How to Get a Brown Tan Instead of Orange
Probably the most important step in achieving a brown tan instead of an orange one is selecting the proper shade for your skin.
However, with that said, we can’t negate the importance of prep work and maintenance!
1. Prep Your Skin
Skin that is not properly prepped before a self-tan is more likely to turn orange.
Excess dry skin soaks up self-tanner more readily than other parts of the body, which can cause unnatural, dark, and orange spots that nobody wants.
To prepare your skin, gently remove dead skin cells by exfoliating in the shower with a textured sponge or an oil-free exfoliator. (like these).
This helps remove excess skin cells, especially in areas that are naturally drier, such as the elbows, wrists, and ankles.
If you want to shave or wax before your tan, which is recommended, do it the day before you tan. This prevents shaving and waxing from stripping away the color when your tan is applied.
Preparing your skin for a self-tan is the first step to ensure that your skin is a clean, fresh canvas, which can evenly absorb the self-tanning product, free from dark patches and an orange tone.
If you do not prep your skin, you can wave an even, bronzed tan goodbye.
2. Pick The Right Formula
You cannot walk into a store and pick any old self-tanner off the shelf. You need to dedicate some thought to picking the right formula for yourself.
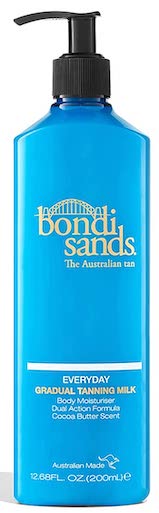
For first-time tanners at home, a gradual tanner is the best option.
It will not give you too much color at first and will ease you into the self-tanning process. My personal favorite gradual tanner is this one from Bondi Sands.
Using a self-tanner, you can build up a tan gradually over a few days or weeks.
If you notice a more orange tone, you can stop applying the self-tanner before it worsens.
To learn about the difference between gradual tanners and instant tanners, you can read this article.
Some have a drier skin tone, and for them, an oil-based tanning lotion would be a great option.
These contain moisturizing ingredients that help to keep the skin hydrated throughout the self-tanning process.
For the more experienced self-tanners, a spray or mist self-tanner is preferred.
While the mist or spray might seem easy to use, it’s essential to know how to apply it to ensure all areas of your body are covered and blended in evenly.
With the sprays, ensure you hold them far enough away from your body to avoid an intense spray and achieve a fine mist.
Another choice is to use tanning wipes. These are fairly easy to use, as long as you can reach all the areas of your body.
3. Pick Your Shade
Once you have chosen the right formula, take some time to select the perfect shade. The wrong shade will definitely leave you looking orange and unnatural.
If you just want a light sun-kissed look, rather go with a lighter shade. For a week-in-the-sun look, try a medium shade, and if you want a noticeable tan, opt for a darker shade.
To cancel out any orange tones, look for a self-tanning formula that contains an added purple or green tint, as these colors neutralize orange and instead leave a brown, bronzed tone.
Additional Tips
Below are additional tips that are just as important as the 3 main steps above! Even after you’ve chosen the right formula and shade for your skin type, there is still much to know about achieving that perfectly bronzed look.
Do Not Over-Moisturize
Most people will advise you to moisturize extensively before self-tanning, and while this is true, there is a problem with over-moisturizing.
You should not spread lotion generously over your entire skin; instead, focus on the problem areas, such as the elbows, hands, knees, feet, and other dry areas.
Applying too much moisturizer to the skin can cause the tan to appear lighter in some areas and even dilute it further.
Even the wrong types of lotion can ruin your tan. To learn which lotions to avoid after a spray tan, read this article.
The drier areas develop much darker than the rest of the body, which is where the tell-tale patchy elbows and knees come from.
Moisturizing these areas helps lighten the tan and blend it into the surrounding skin.
Use A Mitt

You need to protect your hands when self-tanning! When applying too much self-tanner to the rest of your body, your hands will turn bright orange.
Using a mitt, such as one of these, will save you from this and ensure your hands can be blended in naturally at the end, matching the rest of your skin.
With the mitt, start at your ankles and work your way up your body using long and circular strokes to achieve complete coverage.
Spend some extra time blending the product into your elbows and ankles to prevent them from turning darker than the rest of your body. Also, blend the product into the surrounding areas.
Save Your Hands Until The End
A tanning mitt is the key to ensuring your hands do not turn orange and patchy.
Before applying self-tanner to your hands, moisturize them from front to back.
Then, use excess self-tanner left on the tanning mitt to blend into your hands, working your way down to your wrists.
Once you have completed one hand, use a wet wipe to clean away any residue from your nails, cuticles, and palms.
Self-tanner left on nails tends to turn them yellow and pretty gross.
Once this is done, blend a small amount of moisturizer from the bottom of the palm over the wrist crease. This will make the tan seamless.
Avoid washing your hands for a few hours after this.
Don’t Reapply Over Your Whole Body
The tan on your face and hands will fade the fastest, as these two body parts are washed most often.
When these areas begin to fade, do not be tempted to apply self-tanner to the rest of your body as well.
Apply the self-tanner to your hands and face only when needed, and then adhere to your schedule of reapplying the tanner to the rest of your body every one to two weeks.
Applying self-tanner to the rest of your skin when the tan has not faded can leave you with dark and orange patches, as well as unsightly streaks.
Rather than waiting for the tan to fade, exfoliate and then reapply the tan all over.
You can also opt for a cream bronzer to accentuate the tan on your face, resulting in a beautiful, natural glow. My favorite is this one.
Related Questions
How can I make my tan less orange?
If you are in the unfortunate position of having an orange tan after your application, don’t stress too much; there are still a few things you can do to remove the orange tone.
You can use lemon juice to lighten darker areas, or you can create a baking soda mixture to gently scrub your skin.
The baking soda will help remove the orange tones, but it may also leave your tan patchy, so you may need to apply it more carefully after this.
What makes a self-tan turn orange?
The active ingredient in self-tanner is DHA. DHA reacts with dead skin cells, causing them to turn a darker color.
Not all skin types react the same when exposed to DHA, and applying too much DHA or self-tanner to the skin might result in an orange tan.
This is more likely to occur when the self-tanner is applied to pale or light skin tones.
Can I apply self-tan over an existing self-tan?
You should never apply self-tanner over an existing self-tan unless it is a gradual self-tanner.
Applying a self-tan over an existing self-tan can lead to orange, dark patches, which would not be a desirable look for anyone.
You will need to remove the self-tan from your skin before applying a new coat.
Avoiding An Orange Tan – Conclusion
Self-tanning at home can seem daunting, but with the right steps and precautions, you can successfully achieve a natural-looking tan at home without any orange tones.
It might take a few tries to get it perfect, but with these tips, you should be able to achieve a gorgeous bronze glow that lasts all year round, without any unwanted orange tones.
Related Articles
Does Fake Tan Cover Scars? – The Definitive Guide