How To Make Fake Tan Darker – The Essential Guide
Have you been using self-tanner for a while, and wondered how to make your fake tan darker?
Are you happy with the beautiful glow you get from your sunless tanner, but not with the shade?
In this article, I’ll discuss ways to make your self-tanner a bit darker without leaving your skin blotchy, streaky, or orange.
First of all, to answer this super briefly, here are the primary ways you can make your fake tan darker:
- Use a quality self-tanner with higher DHA content.
- Layer your self-tanner by reapplying after it has had time to fully develop.
- Enhance your pre-tan and post-tan routines to optimise your self-tanning experience.
Alright, now let’s delve into a bit more detail about these strategies, as well as discuss a few key tips and tricks.
How To Get A Darker Self-Tan
Self-tanner is becoming increasingly popular every day, as people recognise the dangers of UV rays but still desire a beautiful, glowing tan for the summer and beyond.
Before we discuss how to achieve a darker sunless tan, it’s essential to take a moment to understand how most self-tanners work.

Just about all self-tanners (like my absolute favorite) darken the skin through a safe chemical called dihydroxyacetone, or DHA.
DHA chemically reacts with the amino acids in the outermost layer of your skin, known as the epidermis. This chemical reaction causes the skin to darken, simulating a tan that would be received from the sun.
Since your skin naturally sheds the dead skin cells that hold this colour, you have to reapply it fairly often.
However, this also gives you considerable control over the quality and tone of the tan you receive.
Alright, now that we understand a bit more about how self-tanner darkens the skin, let’s discuss a few of the best ways to achieve a darker fake tan.
1. Use A Darker Self-Tanner With Higher DHA
You might not know this (because many people don’t), but many companies that manufacture self-tanners have products specifically designed to produce a darker tan.
Typically, this is accomplished through a slightly higher amount of DHA. For example, the original version may contain around 10% DHA, while the darker version may contain 12–14% DHA.
These products often also contain other ingredients meant to produce a darker tan.
As a disclaimer, I would usually suggest starting with the original, unless you know you need a darker tone.
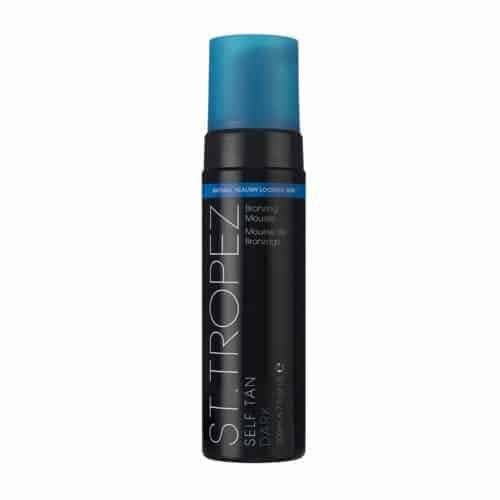
An example of this would be St. Tropez. My current favourite self-tanner is this one.
This is their primary self-tanner, and the one they suggest most people start with. I use it because I just love their products, but that’s for another article. St.
Tropez, though, also offers a darker version of this product, which contains higher DHA, as well as other ingredients to produce a deeper tan.
So, probably the first thing I would do if I were trying to achieve a darker fake tan would be to try a product specifically designed to produce a darker tan.
2. Layer Your Self-Tanner
To start, ensure you read the instructions on your preferred self-tanning product or consult its website before proceeding.
Layering self-tanner has been a popular way to achieve a darker, more natural-looking tan for some time and is almost always a safe and effective option if done correctly.
I remember reading an article on the Little Black Dress blog where Jules Heptonstall (a fake tan guru) stated that during London Fashion Week one year, she was applying up to 5 layers of self-tanner at once to achieve a dark, rich, deep colour on the models.
She basically said that she would start from the feet and work her way upward, and by the time she finished the first coat, the bottom was dry enough to begin the second.
Now, for the average person, this might not be a good approach, as most home self-tanners take 4–8 hours to fully develop their colour (which is why I suggest leaving your fake tan on overnight).
Instead, a good way to achieve a darker, safer tan through layers is to apply it every day for a few days until you’ve found a colour that you like.
Follow your normal nightly self-tan routine (we’ll discuss this further below), apply your favourite self-tanner as usual, and then repeat the entire process the very next night.
The following morning, examine the darker colour and decide if that’s the desired level of darkness. If so, stop there; if not, reapply the next morning.
Just repeat until you’ve found the colour you want!
For an extreme example, watch this video of someone applying 100 layers of self-tanner using a self-tanning mitt.
Tip: Layering self-tanner works best with gradual self-tanning products.
3. Improve Your Self-Tanning Routine For A Darker Fake Tan
One of the best ways to achieve a darker self-tan is to ensure you have your self-tanning routine well-established.
I have other articles on this topic, so I won’t go into too much depth, but here is a quick version of some key things to consider before and after applying self-tanner.
4. Clean and Exfoliate
We discussed how DHA darkens the outermost layer of your skin. This makes exfoliation a crucial part of your self-tanning routine.
Before applying your self-tanner, hop in the shower and use a body scrub to remove any excess dead skin cells. This will allow the self-tanner to develop a more even and complete color.
Pay close attention to the rough areas of your skin, such as your knees, elbows, wrists, and ankles, as they tend to absorb more self-tanner and darken more quickly.
Tip: If you’re going to shave, make sure you also do it at this point.
If you’re in the days right after applying self-tanner, you’re likely to shave off some of the skin that holds the colour, producing streaks and causing the tan to fade more quickly.
5. Moisturise

Another really important step, in fact, I wrote a whole article on it. Moisturising your skin evens out the hydration, allowing your tan to apply evenly over your entire body.
Just as with exfoliation, be sure to moisturise those dry areas.
This is also a step where you can do yourself a huge favour and use a tan-enhancing moisturiser, like the one available on Amazon.
These types of moisturisers are specifically formulated to help extend the life of your fake tan and fade it more evenly. Be sure to use this before your self-tanner, as well as in the days following.
6. Apply Your Self-Tanner
This step depends significantly on the type of self-tanner you’re using.
However, make sure to do an even job and avoid rubbing it too much into your dry areas, such as knees, wrists, and ankles.
If you haven’t tried it before, I’d also highly encourage you to try using a self-tanning mitt, as they can make this entire experience significantly better.
I wrote an article on the best self-tanning mitts if you’re unsure which one to pick.
7. Let It Fully Dry
It’s really important to let the self-tanner fully dry.
This allows the colouring to complete evenly, and you won’t end up with any streaks or blotches.
If you’re looking for some ways to speed up this process, you can see my article on making fake tan dry faster.
After it’s completely dried (probably 10–15 minutes), put on some loose, preferably dark, clothing or pyjamas so that you won’t rub the tan unevenly, and no colour will transfer onto your clothes.
Many people choose to use self-tanner right before going to bed to make this process easier.
If you wake up the next morning and you’re not satisfied with the colour, wait until that evening and apply another coat of your self-tanner.
You’ll wake up the next morning with a darker self-tan, allowing you to reevaluate the colour.
Final Thoughts
Only you can decide how dark a tan is right for you. I would suggest starting with a darker self-tanning product.
If that doesn’t work for you, try some of the other steps in this article.
Good Luck!
Related Articles
Will Fake Tan Cover Varicose Veins?


