

5 Best Self-Tanners For Your Feet
The best self-tanner for feet is often the body tanner you already use, applied lightly. Blend down from your ankles with a small amount left on your mitt rather than adding a fresh pump to each foot.
Dry ankles, toe joints, and rough heels can collect more visible color than smoother skin. That is why feet can turn much darker than your legs, even with the same product.
A separate foot tanner is not essential. Careful preparation, a light layer, and time for the shade to develop usually matter more than buying a different formula.
If you do want another option, a tinted lotion or mousse makes missed areas easier to see. Clear waters and oils avoid an obvious guide tint, but you need to keep track of where you have blended them.
Choose a shade that fits the rest of your tan and a formula your skin tolerates. More product on the feet rarely fixes a poor match, and it can leave dark edges around ankles and toes.
What is the best self-tanner for feet?
Choose a body self-tanner with clear directions and a shade that matches your legs. Apply feet last, moisturize dry areas as directed, and use a light layer. Lotions, mousses, waters, and oils can all work; no format is automatically best for feet.
The five options below offer different textures and finishes. They are general self-tanners rather than foot-specific treatments, so compare the format first, then use the application tips to avoid heavy color on small, dry areas.
5 Best Self-Tanners for Your Feet
Clear formulas can appeal if you dislike an instant bronzer, while a tinted lotion can help you see coverage. Neither guarantees a streak-free result or suits every skin type.
Check the current bottle’s ingredients and instructions before buying, especially for older product listings. Try a small area first if the formula is new to you.
1. Isle Of Paradise Self-Tanning Water

Isle of Paradise Self-Tanning Water is an option for someone who prefers a clear water format. The main trade-off is that there is no obvious bronzer map to show where you have already applied it.
The brand’s water application instructions recommend leaving hands and feet until last, then blending with a mitt. Do not coat your feet as heavily as your lower legs.
Blend the remaining product over the tops of the feet and toes, softening the transition at the ankles. Work systematically so you do not repeatedly coat the same area while trying to spot invisible coverage.
Moisturize dry feet and ankles before application as directed, letting the lotion absorb. This is preparation for a more even-looking result, not a guarantee that rough patches cannot darken.
A mitt helps distribute the water and limits palm staining, but wash your hands afterward too. Follow the spray’s instructions, avoid inhaling mist, and let the skin dry before putting on shoes.
Check the bottle’s light, medium, or dark shade before ordering. Let the developed color appear before deciding whether you need another layer; an invisible initial application is not a reason to keep spraying.
2. Coola Self-Tanning Dry Oil Mist

COOLA Sunless Tan Dry Oil Mist is an older self-tanning format to compare if you prefer an oil-style finish. It is different from COOLA’s current SPF body oil mists, which should not be assumed to create a self-tan.
The dry-oil format may appeal if you dislike a thicker lotion. It still needs controlled application and blending, particularly around ankles and toe joints; oil texture does not prevent uneven color.
Check availability and the exact bottle’s development and rinse directions before buying. Build color only after the previous application has developed and the skin is comfortable, rather than automatically layering it over another tanner.
Main limitation: a fine mist can cover more area than you intended. Use the label’s application method, blend carefully, and wash your hands. “Transfer-resistant” wording does not mean you can immediately put on socks or shoes.
3. Miami Gorgeous LaPlaya Clear Self-Tanner
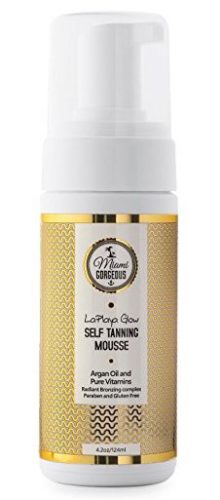
Miami Gorgeous LaPlaya Clear Self-Tanner suits someone who prefers a formula without a visible guide bronzer. Clear application does not guarantee that wet product cannot mark a surface.
The brand’s current Clear Tanning Water page describes a clear mousse applied with a mitt to clean, dry skin. Confirm that you are buying the clear version rather than the separately listed tinted LaPlaya Glow mousse.
It gives temporary cosmetic color without deliberately exposing your feet to UV. It does not provide sun protection, so you still need sunscreen when wearing open shoes outdoors.
If you prefer a mousse, it may be easier to spread a small amount from the mitt than to aim a spray at each toe. Prepare dry patches separately instead of assuming the tanner will fix them.
Main limitation: clear coverage is harder to judge while applying. Use a light, even pass and wait for the final shade before touching up; no formula can promise perfectly matched feet on every application.
4. Mystic Tan Sunless Self-Tanning Airbrush Spray

Mystic Tan Sunless Self-Tanning Airbrush Spray offers a spray format for those who prefer misting to spreading lotion. Some versions include an instant bronzer, which is separate from the developed self-tan.
Use the exact bottle’s spray distance and blending directions. Avoid directing extra spray into toe creases or onto the soles: these areas do not need the same coat as the tops of your feet.
The brand’s older product guidance advises spraying lightly and blending around feet and ankles. A fine mist still needs careful placement; repeated passes can create dark patches.
Check the current ingredient list rather than assuming “low odor” means fragrance-free. Spray where the label permits, avoid inhalation, and follow any ventilation or flame precautions.
DHA and, in some versions, erythrulose develop cosmetic color. They are tanning ingredients, not opaque pigments that selectively cover uneven areas, and they do not guarantee a particular shade on your skin.
Main limitation: the older airbrush listing may differ from current Mystic Tan products. Confirm the exact formula and directions, and allow the stated drying and development time before wearing close-fitting footwear.
5. SunLab Self-Tanning Lotion

Sun Laboratories self-tanning lotion is an option if you prefer a cream texture to a mist. The amount you use on feet should be much smaller than the amount used across a whole leg.
A lotion can be easy to distribute with a mitt, but a richer texture does not automatically prevent color buildup on dry ankles or heels. Prepare those areas first and avoid rubbing extra product into them.
Choose this for temporary color without sunbathing, rather than expecting skin protection or a toned appearance. Sunscreen remains a separate part of your routine.
The brand’s Dark Sunsation lotion set is described as Very Dark. Confirm the shade of the linked item, especially if your legs are only lightly tanned; a deep formula may be harder to keep subtle on the feet.
Some Sun Laboratories bundles include a mitt, while others are lotion-only. Check the seller’s contents. A mitt is useful for blending the small amount needed across the foot and reducing palm staining.
Main limitation: a dark lotion offers less room for heavy-handed application. Start lightly, follow the label’s development time, and avoid a second layer until you have checked the shade against your legs.
Tips for Applying Self-Tanner to Feet
A good result comes from using less product at the feet and keeping the transition from your legs soft. The steps below work with your chosen product’s directions rather than replacing them.
Set aside enough time for preparation, drying, and development. If you are having a pedicure, schedule the soaking and scrubbing before self-tanning, allowing any irritation to settle first.
Exfoliate gently. Before tanning, smooth loose, flaky skin with a gentle method your skin tolerates. Do not aggressively file heels or scrub irritated skin just to make it take color evenly.
If you have painful cracks, cuts, or a rash, let the area recover before applying tanner. Persistent foot problems are a reason to seek appropriate care rather than covering them with color.
Preparation can reduce patchiness, but it cannot guarantee identical color on every surface. Avoid tanning the soles and thick heel calluses; the goal is a natural transition on the visible tops of your feet.
Moisturize dry areas. Keep feet moisturized in the days beforehand. Immediately before tanning, follow the product’s advice about a small amount of lotion on ankles and other dry patches.
Let that moisturizer absorb instead of covering the whole foot with a thick, slippery layer. Too much residue can make the tanning product harder to spread predictably.
Reserve heavier heel creams for your regular foot-care routine, with time for them to absorb. Do not apply tanner over broken heel skin or try to force a matching shade onto calluses.
Dry texture can make self-tan look darker or uneven. If one patch is already too dark, adding more tanner to it is unlikely to improve the blend.

Blend from ankle to foot. After tanning your legs, lightly sweep the remaining product on the mitt across the ankle and top of each foot. The AAD’s self-tanner guidance recommends lightly extending color from ankles to feet.
Use gentle pressure and soften the edges around the sides of the feet. Avoid a hard line at the ankle or a ring of extra product around it.
Keep toes light. Use what remains on the applicator to skim the tops of the toes. Do not add another pump just to cover these small areas, and avoid leaving wet product in creases.
Check for excess around toenails and cuticles, wiping it away gently before it develops. You do not need to tan the deep spaces between toes or the undersides to make the visible tops match your legs.
Allow drying time, then protect exposed skin. Keep feet away from water and sweat for the label’s development period, and avoid socks or tight straps while the product is wet. Self-tanned feet can still burn.
Use broad-spectrum SPF 30 or higher on the exposed tops of your feet when outdoors, including around sandal straps. Reapply as directed and after swimming or sweating. Sunscreen is for skin protection, not a guarantee of longer-lasting self-tan.
Fix patchiness gently. If the old tan is fading evenly, a light maintenance application may be suitable under your product’s directions. If it is blotchy, let the color fade and gently exfoliate before a fresh application.
Do not scrub until your skin is sore to remove every trace. Dark color around toes and ankles may need several days to fade; aggressive same-day removal can irritate the skin and make the next application harder.
Perfectly Bronzed Feet
Feet usually need a lighter touch than legs. A small amount, careful blending, and patience during development give you more control than repeated coats.
If you are unsure which product to choose, try your existing body tanner first. A new water, oil, or mousse is useful only if its format makes application easier for you.
Once the color is where you want it, keep cleansing and moisturizing gently. Save long soaks and exfoliating pedicures for when you are ready to let the tan fade.
Related Articles
How To Spray Tan Hands And Feet


