*This post may contain affiliate links. Please see my disclosure to learn more.
Self-tanner can give you a warmer glow without sunbathing, but finding a shade that feels right on fair skin takes a little care. If you have red hair and freckles, a subtle first application is a good place to start. Remember, the color itself does not protect you from sunburn.
There isn’t one self-tanner that suits every redhead. Your starting skin tone, the depth of color you want, and how much time you have for application matter more than your hair color alone.
What is the best self-tanner for redheads?
For fair-skinned redheads who want subtle color, a light gradual self-tanner is a practical starting point. Jergens Natural Glow in a lighter shade offers that approach, while a light self-tanning lotion suits those who prefer less frequent application. Choose wash-off leg makeup if you want immediate coverage instead of a developing tan.
Below, you’ll find five options with different textures and uses, from gradual lotion to mousse and temporary leg makeup. These are formula-based suggestions, not a promise that every shade will work on your skin.
Self-Tanners And Redheads – The Complete Guide
Let’s look at choosing a shade, what happens to freckles, and how to avoid the dark patches that can stand out on fair skin.
What Tanning Shade Complements Red Hair?
If you want a barely-there glow, start with a product labeled light or fair to medium. When browsing shade advice for redheads, keep your own starting skin tone in mind. A deeper formula can create more contrast between your face, neck, and body, especially if you only tan your legs.
Test the shade on a small, discreet area before a full application. Allow the complete development time and rinse if instructed, then check the finished color in daylight. The tint you see when applying may be a guide color that washes off.
Red hair doesn’t always mean very pale skin, and fair skin can have warm, cool, or neutral undertones. Use your actual skin tone as the starting point rather than choosing a formula solely because it is marketed to redheads.
A darker tan is a personal preference, but building color gradually gives you more chances to stop at a shade you like. Wait until each application has fully developed before deciding whether you need another layer.
For a subtle result, choose a light shade rather than relying on a particular pink, green, or brown base. Those color descriptions vary between brands and don’t guarantee the finished shade on your skin.
Fair skin isn’t automatically sensitive. A personal self-tanner review can help you compare routines, but it cannot predict how your skin will react. Check for ingredients you already know you cannot tolerate and follow the label’s patch-test instructions. Natural or organic ingredients can still cause irritation.
Will Self-Tanner Cover Freckles?
Self-tanner does not cover freckles like foundation. DHA, the tanning ingredient in most developing formulas, changes the color of the skin’s surface. A thicker layer won’t turn it into opaque makeup.
A light application may make the contrast between freckles and surrounding skin less noticeable, but it can also make some freckles look darker. The effect depends on your skin and the formula, so test a freckled area as well as checking the overall shade.
If covering freckles is your goal, look for tinted body makeup rather than expecting self-tanner to hide them. Sally Hansen Airbrush Legs, included below, is a wash-off option for temporary leg coverage.
Skip sunbathing as a way to blend your freckles into a tan. A sunless product lets you add cosmetic color without deliberately exposing your skin to UV rays.
You don’t need to disguise every freckle for the result to look even. Focus on smooth application around ankles, knees, and wrists, where excess product is more likely to leave obvious dark patches.
Gradual tanner gives you control over overall color, but it still uses a developing tanning ingredient. It isn’t a guarantee that freckles will stay the same shade or become less visible.
Use the recommended amount, let the color develop, and pause applications once you’re happy. Applying extra product directly over freckles can make that area darker than the surrounding skin.
If a shade test leaves your freckles looking more prominent than you’d like, try a lighter formula or temporary makeup. You don’t have to keep layering the same product to make it work.
Self-tanner is even used to create faux freckles, which is a useful reminder that concentrated product can leave a darker spot. Blend carefully rather than dabbing extra tanner onto individual marks.
5 Best Self-Tanners For People With Red Hair
These five options suit different routines. A gradual lotion is useful for cautious beginners, wipes are convenient for travel, mousse has a visible application guide, and leg makeup provides color you can wash off the same day. Check the selected shade and current label before buying, as listings may offer several versions.
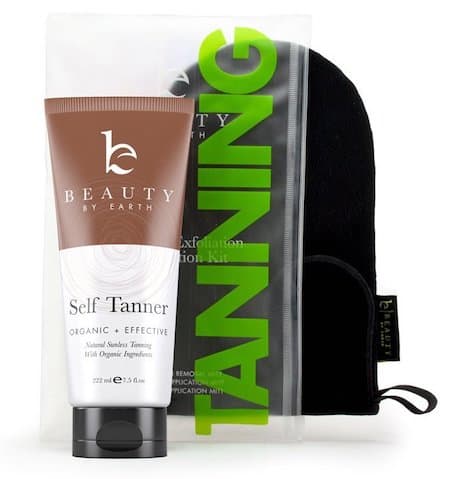
Beauty By Earth is an option for anyone who prefers a moisturizing lotion texture to a foam or spray. For a subtle result on fair skin, choose the lighter version rather than assuming every bottle in the range gives the same depth.
Best fit: a lotion-style self-tanner for a light, buildable glow. The main trade-off is that its untinted formula gives you less visual guidance while you blend than a bronzing mousse.
The brand currently labels its lighter body lotion Light; older packaging may say Fair to Medium. Check the shade on the listing and bottle, since shade names and packaging can change.
Apply an even layer and give it the full development time on the label before judging the color. A second coat can deepen the result, so don’t automatically reapply just because there is little visible color at first.
The body lotion’s ingredient list includes shea butter and coconut oil, which contribute to its moisturizing feel. These are useful texture features, but they don’t make the formula suitable for every skin type.
If you have sensitive skin, check the current ingredient list and patch-test as directed before a full application. Stop if irritation develops, and avoid applying tanner to skin that is already sore or inflamed.
Best fit: a compact option for travel or occasional applications. TanTowel packages a clear self-tanning formula in individual towelettes, so you don’t need to pack a bottle of lotion.
The wipe format is convenient, but clear product makes missed areas harder to spot. Work in sections and keep blending evenly; don’t rely on the wipe to replace your usual gentle exfoliation beforehand.
TanTowel’s Classic formula is intended for fair to medium skin, while Plus is intended for medium to dark skin. Check which version the listing offers rather than trying to make a deeper formula lighter by wiping it on unevenly.
Use circular motions on clean, dry skin and wash your hands afterward. Leave knees, elbows, ankles, and the backs of hands until last, using a lighter touch on those areas.
The manufacturer says color begins developing within a few hours and can continue developing for up to 24 hours. Stay dry for the time stated on your pack, and wait for the finished shade before adding more.
Individually wrapped wipes are handy to store, but a touch-up can overlap an existing tan and create darker patches. For a larger area, use the correct wipe size and enough product for even coverage rather than stretching a drying wipe too far.
Best fit: instant, temporary color and coverage on the legs. Sally Hansen Airbrush Legs is leg makeup, not a developing DHA self-tanner. It can soften the appearance of freckles and visible veins while it is on the skin.
The brand describes Airbrush Legs as water- and transfer-resistant, but that doesn’t mean it can never rub onto clothes. Blend evenly, let it set as directed, and take care with pale fabrics or tight hems.
Light Glow is a shade name, not a guarantee that it will match very fair skin. Try a small amount in daylight and compare it with your feet and the rest of your body before covering both legs.
This is useful when you need color for an event and don’t want to wait for a tan to develop. Follow the instructions for the spray or lotion you buy, and remove it with soap and water afterward.
Best fit: a gradual tanning lotion for beginners who prefer a daily moisturizer routine. Jergens Natural Glow +Firming comes in different skin-tone options; Fair to Medium is the more suitable starting point for a subtle glow on fair skin.
Its developing color builds with repeated use rather than providing makeup-like coverage straight away. The ‘firming’ wording describes a cosmetic appearance claim, not a reason to expect lasting changes to cellulite or skin structure.
The lotion combines moisturizing care with gradual tanning, so it may suit skin that feels dry. It is scented, however, so check the ingredients if fragrance tends to bother you.
Smooth it on evenly, wash your hands, and allow it to dry before dressing. Follow the label’s application frequency and pause when you reach your preferred shade rather than layering daily indefinitely.
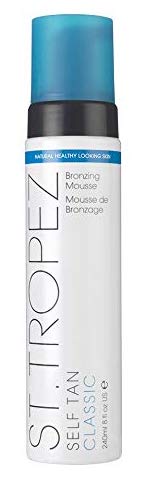
Best fit: a tinted mousse when you want a visible guide during application. St. Tropez Classic Bronzing Mousse creates a medium golden tan, which may be deeper than a very fair-skinned beginner wants.
The initial tint helps you see where you’ve applied product, making missed patches easier to spot. Use a tanning mitt and blend in sections, with only the leftover product over dry joints and the backs of hands.
The Classic mousse is generally a leave-on developing formula, with the brand describing a 4-8 hour development window. Follow your bottle’s rinse instructions; Classic and Express are different products and should not share the same timing assumptions.
The mousse is fragranced, so it may not suit you if scented products irritate your skin. Let it dry before dressing, choose loose clothing during development, and don’t assume a quick-drying finish guarantees zero transfer.
Self-Tanning Tips for Redheads
A careful first application is more useful than chasing the deepest shade. These tips help you control the result on fair skin and around freckles.
Use Tinted Moisturizers
A gradual tanning moisturizer adds developing color over several applications. A tinted moisturizer or body bronzer may simply provide wash-off color. Check whether the formula contains DHA and whether its instructions describe development or removal.
Choose gradual lotion if you want to build a light tan over time. Choose wash-off body makeup if you want an immediate result for one evening and the option to remove it afterward.
Neither moisturized skin nor a darker-looking skin tone replaces sun protection. Keep sunscreen in your routine even when the tan looks convincing.
Exfoliate Gently Before Tanning
Gently exfoliate before tanning to remove loose surface skin. Scrubbing until your skin feels raw can leave you with irritation rather than a better tan.
Pay attention to knees, elbows, and ankles, then let your skin settle and dry fully. If the label recommends moisturizing dry areas before application, use a light layer and allow it to absorb.
It’s super important to exfoliate!
Most developing self-tanners use DHA, which reacts with amino acids in the outermost layer of skin, the stratum corneum. Dry surface skin can develop a darker-looking result, so careful preparation and less product on dry joints help reduce patchiness.
Plan Hair Removal Ahead Of Time
Hair removal is optional. If you shave or wax, do it ahead of tanning rather than immediately before, and follow your product’s suggested waiting time.
Wait until any redness or stinging has settled before applying tanner. Don’t apply it over razor cuts, irritated skin, or a freshly waxed area that still feels tender.
Body hair doesn’t mean you cannot self-tan. Blend the formula onto the skin underneath it, using a lotion or mousse texture you can spread evenly without leaving product clumps.
Give knees, ankles, and feet a final blending check, and use only a small amount around the toes. More product won’t cover blemishes, but it can leave those dry areas much darker.
Avoid shaving during development, and plan any wax appointment before your tan where possible. Hair removal afterward can lift some surface color and make the tan fade unevenly.
Start With Clean, Dry Skin
Start with clean, fully dry skin. Remove makeup, deodorant, and any residue that your tanner’s instructions say to avoid.
Follow the label if it recommends moisturizer on dry joints. Once you’ve applied the tan, avoid water, heavy sweating, and tight clothes for the specified development period.
Choose Your Shade Carefully
Choose a shade based on your starting skin color and the result you want. A light option gives a cautious beginner more room to assess the color before going deeper.
Match the depth across the areas you plan to tan. If only your legs are bronzed, check them beside your arms and face so the difference feels intentional rather than surprising.
Don’t assume that all redheads need a brown or green base, or that every gold-toned formula will turn orange. Guide colors and shade descriptions are not standardized between brands.
Pick a shade that suits your skin
Test a discreet patch and judge it after the full development and rinse instructions, in daylight. For a big event, allow time for that trial before applying the product everywhere.
If the result is too dark, avoid adding more layers. Let it fade, moisturize, and use gentle exfoliation once the skin is comfortable rather than trying harsh scrubs or household chemicals.
Apply A Light, Even Layer
Use a thin, even layer according to the label. Applying extra product on fair skin can make missed blending around wrists and ankles more obvious.
Self-tanner adds color rather than concealing skin texture or individual freckles. If you want coverage, a separate body makeup product is the more appropriate choice.
Let the first layer develop completely before deciding whether to build the shade. With gradual lotion, follow the recommended schedule and stop when you’re happy with the depth.
Freckles can still show through an even tan, and that’s normal. Check for application streaks rather than treating every visible freckle as a missed spot.
Make The Most Of It
Developing tans usually fade over several days as surface skin sheds; wash-off makeup lasts only until it is removed. The exact wear time depends on the formula, your skin, and your routine.
Moisturizing at the right time helps with preparation and aftercare. Once the tan has developed, moisturize daily and avoid aggressive scrubbing for a more even fade. There is no need to reject every moisturizer containing petroleum ingredients; follow any aftercare guidance on your tanner.
Some tinted formulas use green, violet, or other guide colors to change their initial appearance. That temporary tint may rinse off, so don’t judge the final tan from the color in the bottle or on a mitt.
Compare the finished result on your own skin. A shade test gives you more useful information than a blanket rule about which color base every redhead should use.
Related Questions
How do you self-tan properly?
Prepare gently, start with clean, dry skin, and apply evenly in sections. Blend carefully at wrists and ankles and wash your hands if you apply without a mitt.
Use the amount, drying time, and rinse schedule on your particular product. Gradual lotions, classic mousse, express formulas, and wash-off makeup don’t all work on the same timetable.
Is self-tanning safe?
Self-tanner lets you add color without deliberately exposing yourself to UV rays, but a formula can still irritate your skin. Use it as labeled, avoid the eye area and lips, and prevent inhalation of sprays. The FDA explains the precautions for sunless tanners, including why the resulting color does not provide sun protection.
Final Thoughts
For a subtle first tan, choose a light gradual lotion and test it before a full application. If you prefer a visible guide while blending, a tinted mousse may be easier to track, but check its depth carefully.
For immediate leg coverage, use wash-off makeup rather than expecting DHA to hide freckles. Whichever option you choose, the best result is a shade you feel comfortable wearing and a routine you can manage.
I hope you enjoyed my article on the best self-tanners for redheads.
I've loved tanning ever since I was pretty young. I realized over time that If I wanted to maintain a beautiful bronze glow, and not damage my skin, I'd have to learn to use self-tanners. This blog is a place for me to share everything I've learned! Curious what my absolute favorite self-tanner is? Find out here.